

5 tips to organise your footage before you edit
I am frequently asked by clients how best to organise large amounts of footage, and whether I have any tips on this. I used to be tremendously unorganised, however as my business grew and deadlines became tighter I found myself relying more on proper folder structure, naming conventions and other organisational tricks to keep all of my files close to hand, and ultimately save myself time.
Naming conventions
One of the things that can really confuse a piece of software (PluralEyes, I’m looking at you) is to have several files with the same name. This can happen if you’re shooting across several cameras. This is why I recommend that if you can’t batch-rename your files in-camera, it can be a good idea to do this when you backup your footage after the shoot. For example you’re shooting Emma & Tom's wedding, you could give your files the prefix ‘ET’, meaning your files for this project would be ‘ET-C0001’ etc.
This will also prevent any potential mixups with footage for other projects, unless you find yourself having shot the wedding of ‘Ellie & Tim’ on the same weekend without dumping your footage and formatting your card in between…
Folder structure
Of course, most NLEs don’t work from file names alone, so when I get to editing your footage, my editing software will also take into account the name of the folder the footage is being accessed from, as well as data from your camera. Creating a folder for your project, so for example ‘Emma & Tom’, a subfolder for ‘Footage’, and within this more subfolders for each separate camera you used makes the whole job more efficient, and helps with faster sorting when I get to organising it into Bins!
Bins
When I get into the edit, bins are a great way to sort footage within the software. Depending on the project, I will use bins for different things. To keep cameras or angles seperate, or to split up sections of a shoot.

Using bins can be a great way of seeing exactly what you have, and accessing what you need quickly.
You can use bins as you would use normal folders, by organising your footage based on camera, card, roll, or just anything you need at the time. There’s no rule book!
Tags
I LOVE TAGS. They are one of my favourite features, especially in FCPX. I take them all off before I deliver an edit to my clients because it can look messy and I don’t always want them to see 100+ tags full of typos or half-ideas of things I thought about doing before deciding to try something else, but by the time I've finished an edit there will be tags everywhere! My workflow is different for each client. For more complex edits, I will use tags directly on the music track or base layer to pinpoint where I would like certain things to happen within the edit.

When I’m actually editing, I will use tags to remember things I want to do with a clip, or to mark out shots that would be good to use at a certain point I haven’t got to yet. In some cases I'll use a tag to remind myself to adjust something I notice at the time, such as a note for colour grading or a shot that may need extra stabilisation work. In FCPX, I love that I can see all my tags and click on each one to bring me to that exact point in the edit.

I have my own custom keyboard shortcuts that I use across all editing software, and one of the most important ones is my shortcut to create and edit tags.
Colour labels
This is something that I really only do in Premiere, but I absolutely love it.
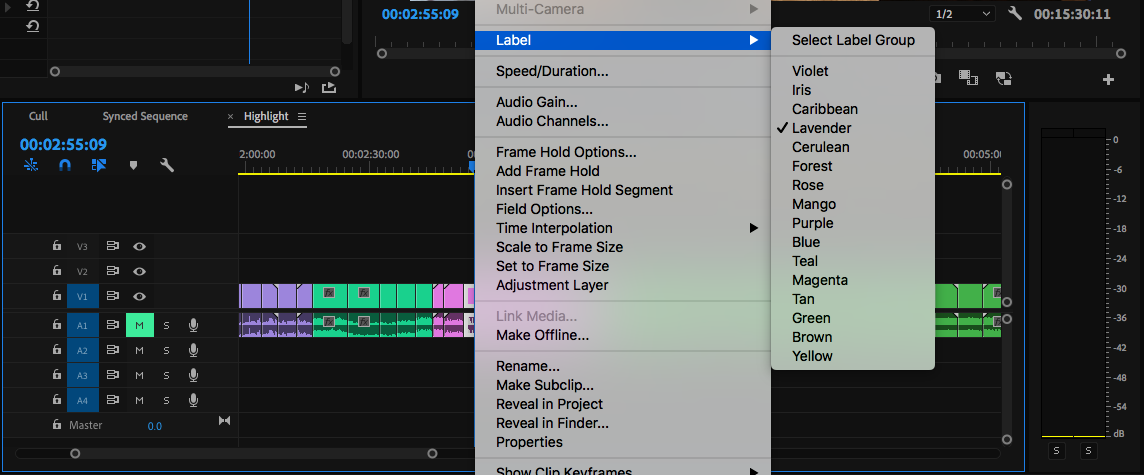
Similar to how I organise bins, when I have a full shoot’s worth of footage in my timeline, the first thing I will do is colour-code different sections to make them easier to find.

I find that my brain works best with colour coordinated data, so this feature is ideal and time saving.
These are just some of the tools I use to organise footage for a smoother workflow. Check out my FAQ for filmmakers to learn more about my process and how you can outsource your video editing.
Thanks for reading!